How to import test results to Jira Xray
December 7, 2024
Keywords: Jira Xray, Xray integration, Xray tests
Read time: 10 minutes
Level: Intermidiate
Integrating test results into Jira Xray can streamline your QA process, ensuring better traceability, real-time insights, and improved collaboration between testers and managers. By linking automated and manual test outcomes directly to Jira, your team can track testing progress effortlessly and make informed decisions faster. In this guide, we’ll walk you through the process of integrating test results into Jira Xray, helping you maximize efficiency and keep your projects on track.
What is Jira Xray
Jira Xray is a powerful test management tool integrated with Jira, designed to help teams streamline their testing processes and ensure high-quality software delivery. It allows QA teams to create, manage, and execute both manual and automated tests directly within Jira, linking them to user stories, requirements, or defects for end-to-end traceability. With Xray, teams can generate comprehensive reports, track test coverage, and visualize the overall quality of their projects, making it an essential tool for Agile and DevOps environments. Its seamless integration with CI/CD pipelines further enhances productivity, enabling faster feedback and continuous improvement.
Prerequisites for Xray integration
Make sure you have Jira cloud or server instance with Xray installed. Please use Xray documentation for installation:
- Jira Xray server: installation
- Jira Xray cloud: installation
Automatic Xray tests provisioning
Automatic Xray tests provisioning process means that tests will be first created in Testlemon and then will be imported to Jira Xray.
Go to top navigation menu and click Create button.

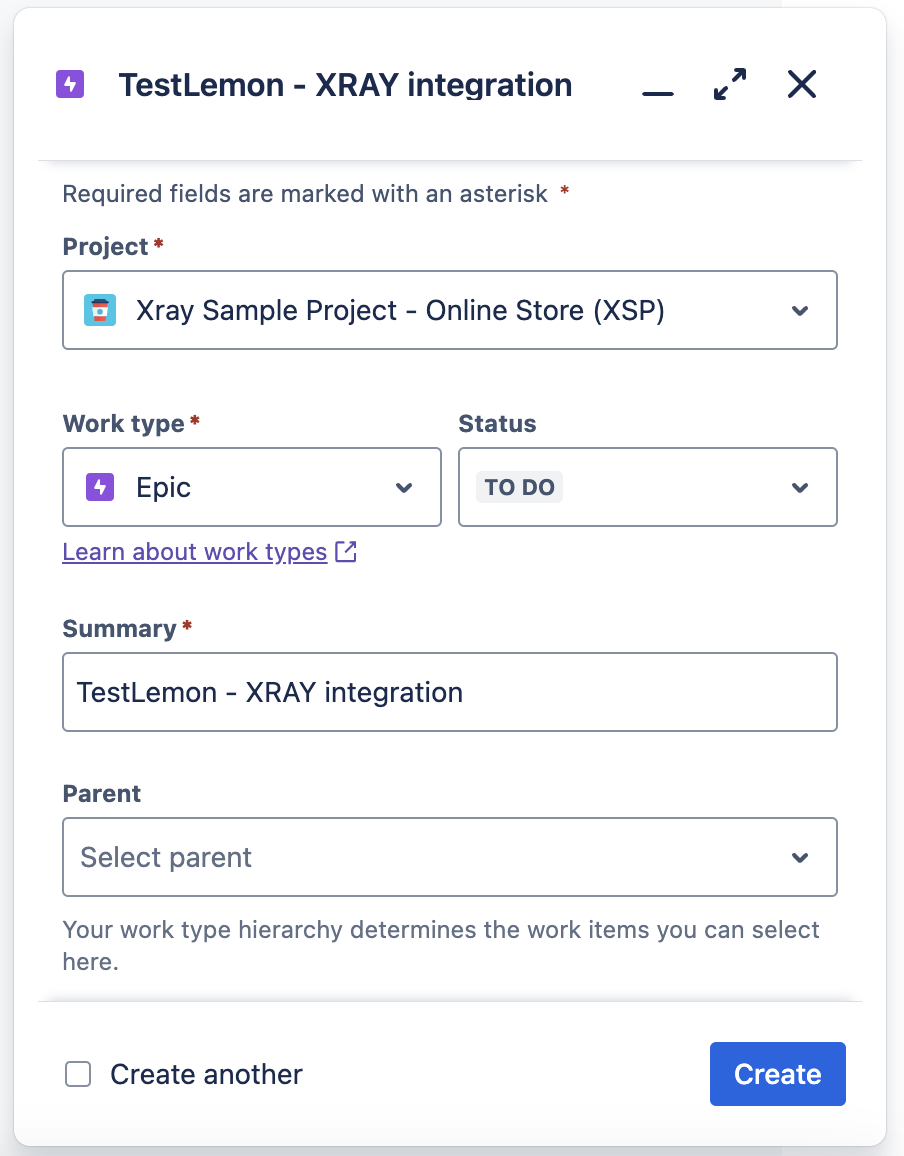
Create a new EPIC in JIRA. Choose issue type Epic click Create.
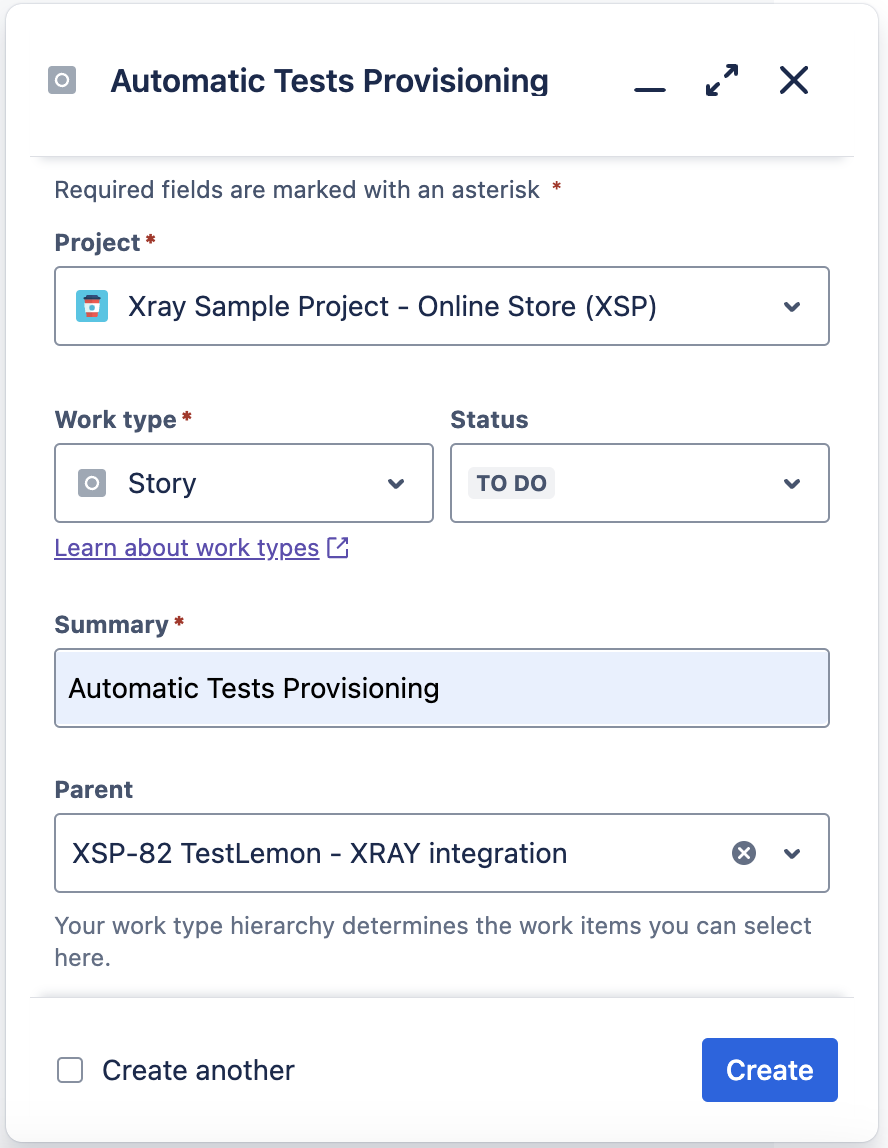
Create a new Story in JIRA. Go to top navigation menu and click Create button. Choose issue type Story, select parent Epic and click Create.
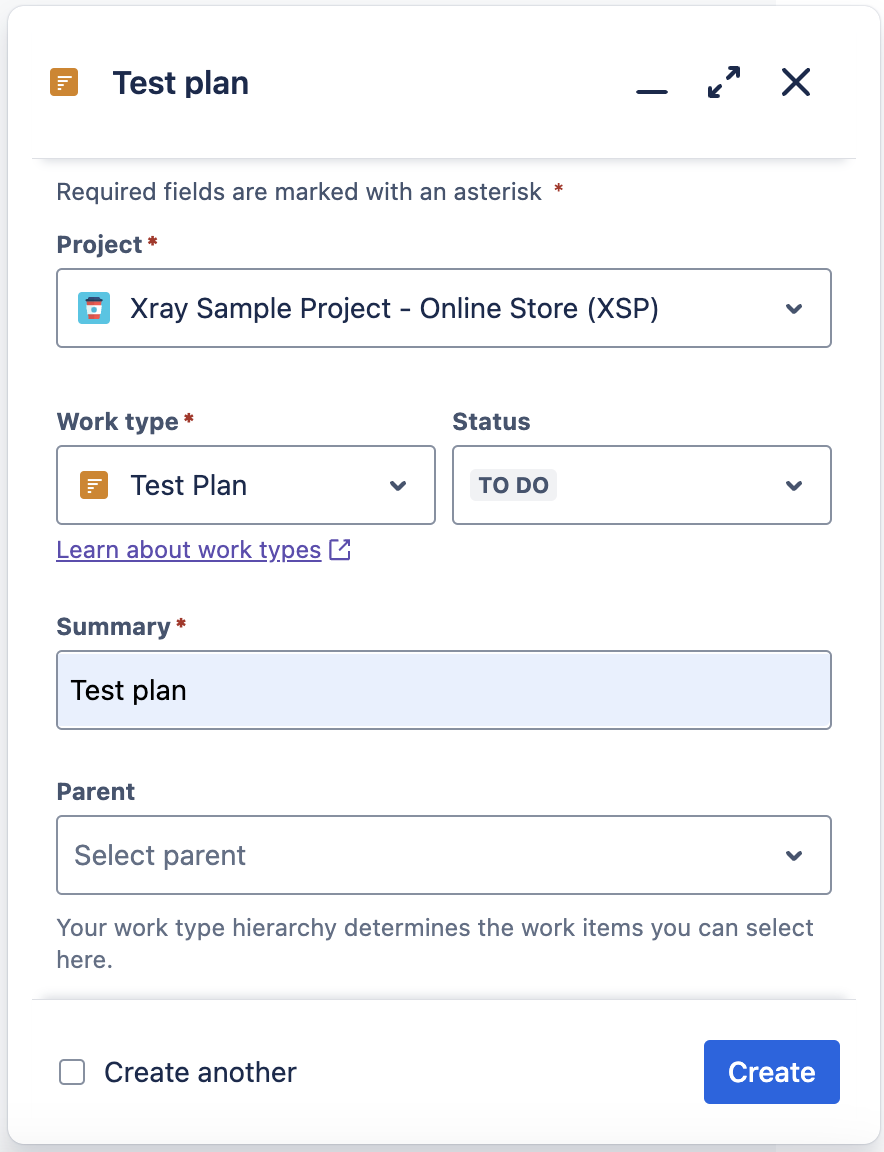
Create a new Test plan in JIRA. Go to top navigation menu and click Create button. Choose issue type Test Plan and click Create.
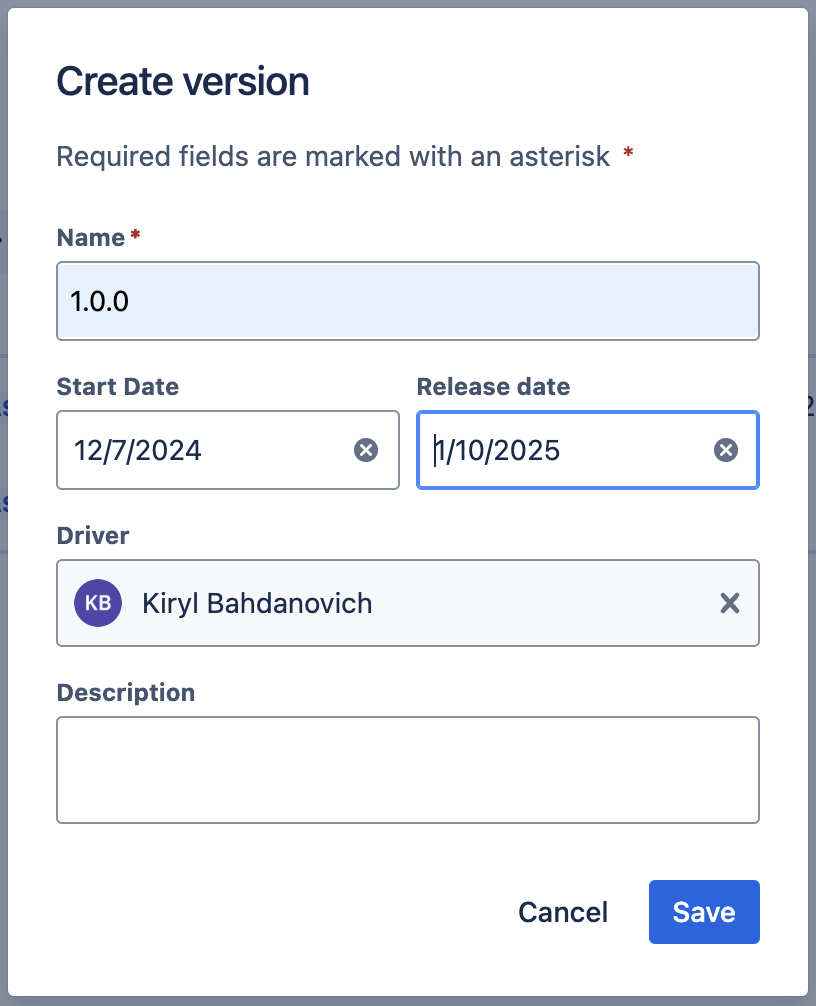
Create a new Version. Go to left navigation menu Development > Relases. Click Create Version button and create a new version.
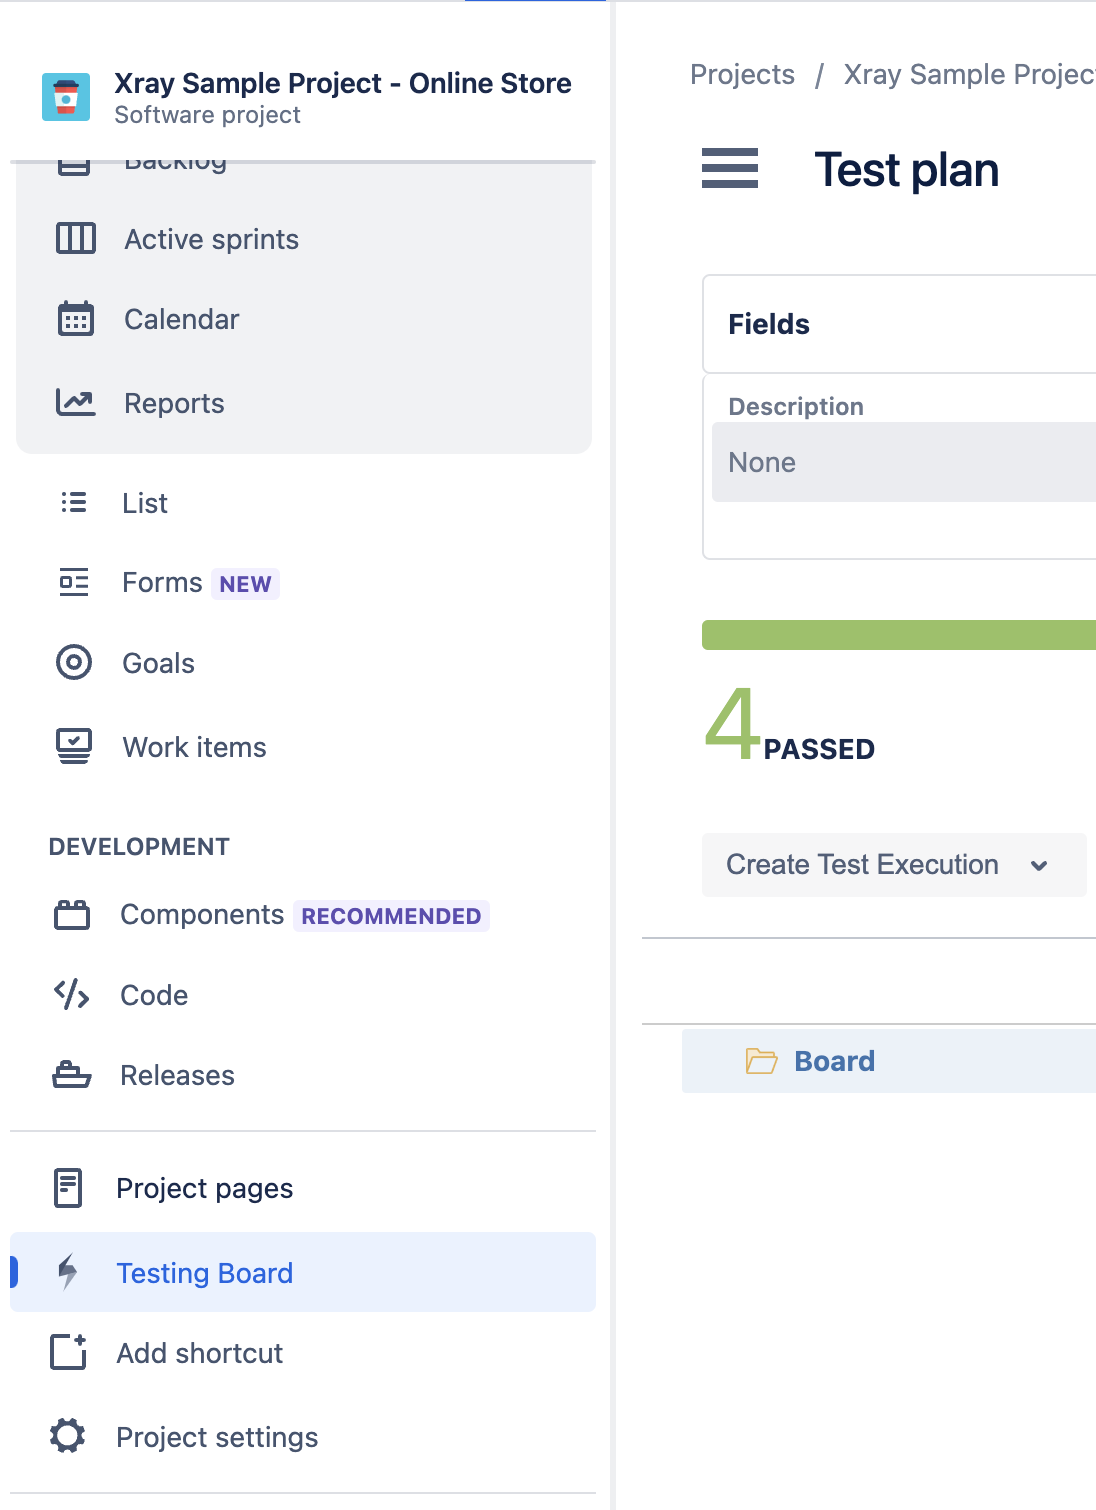
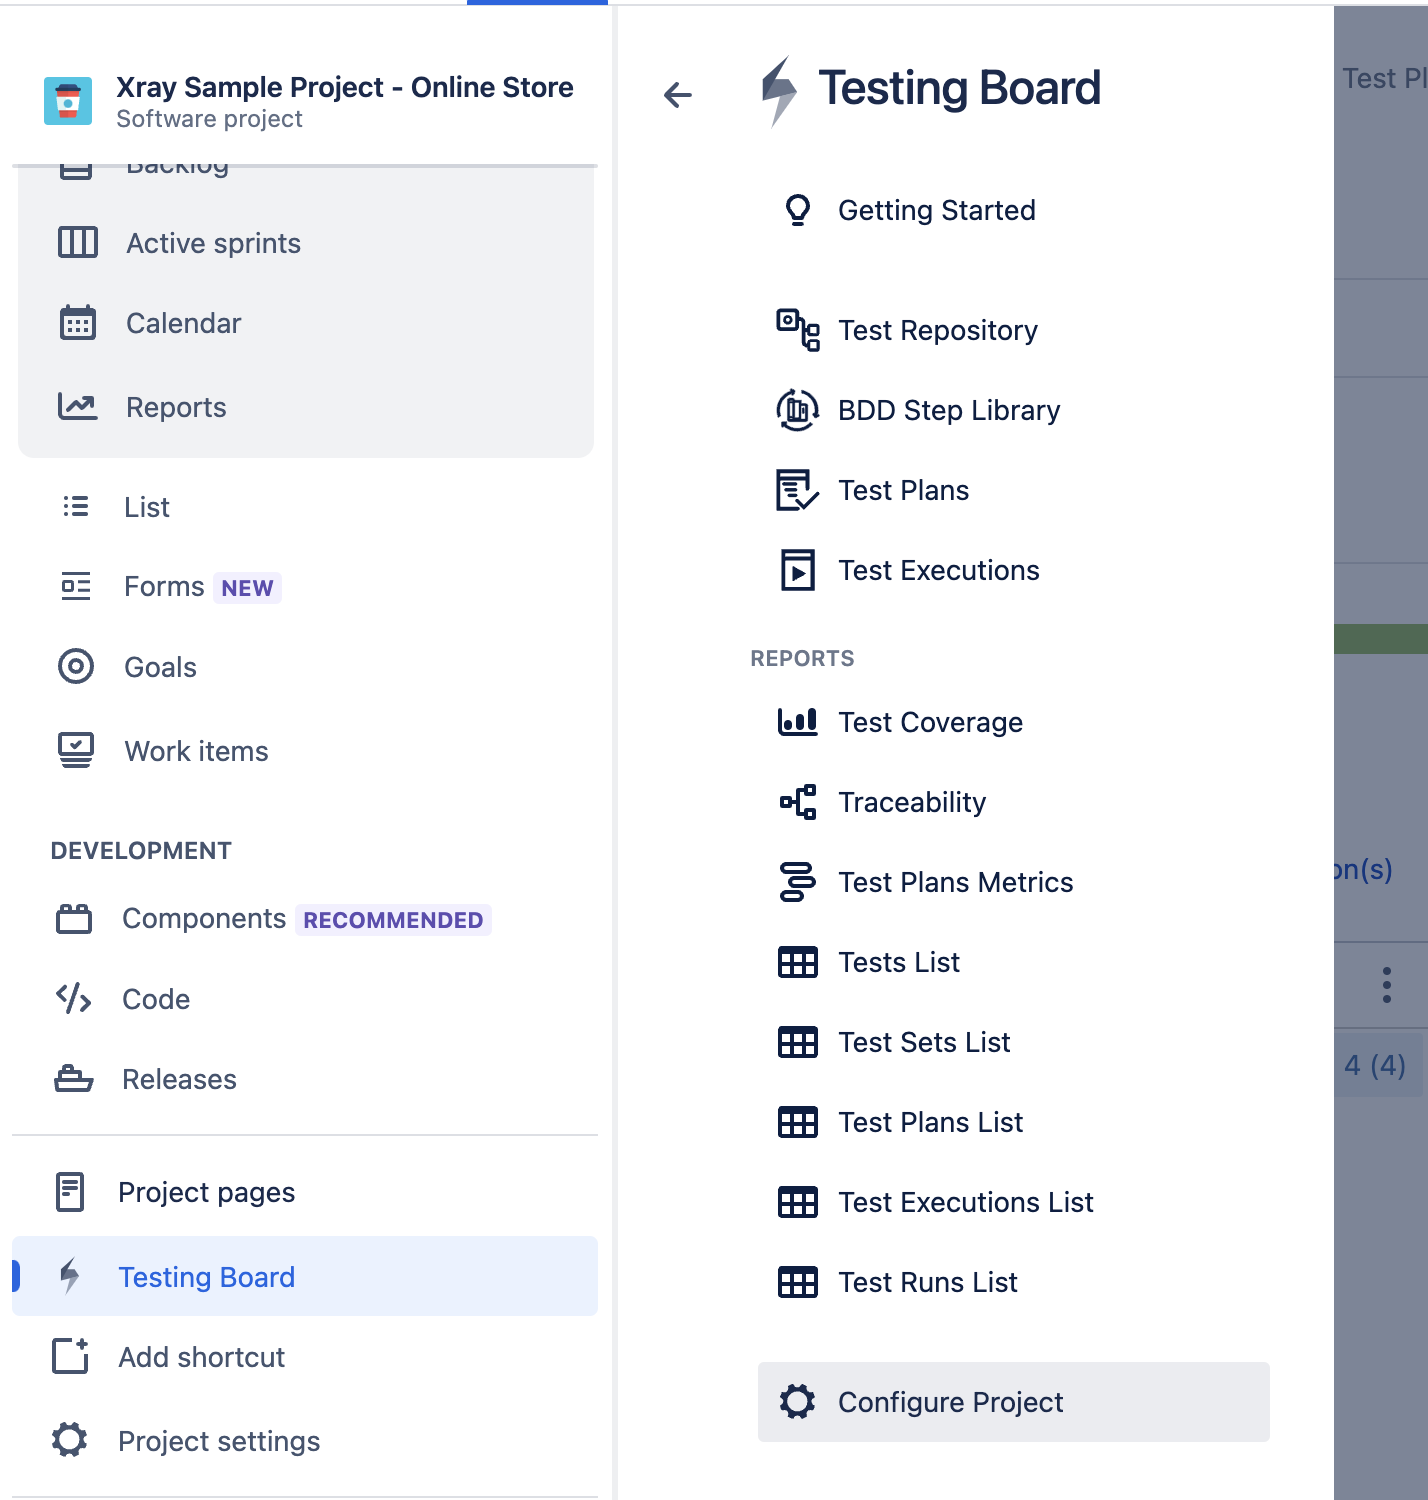
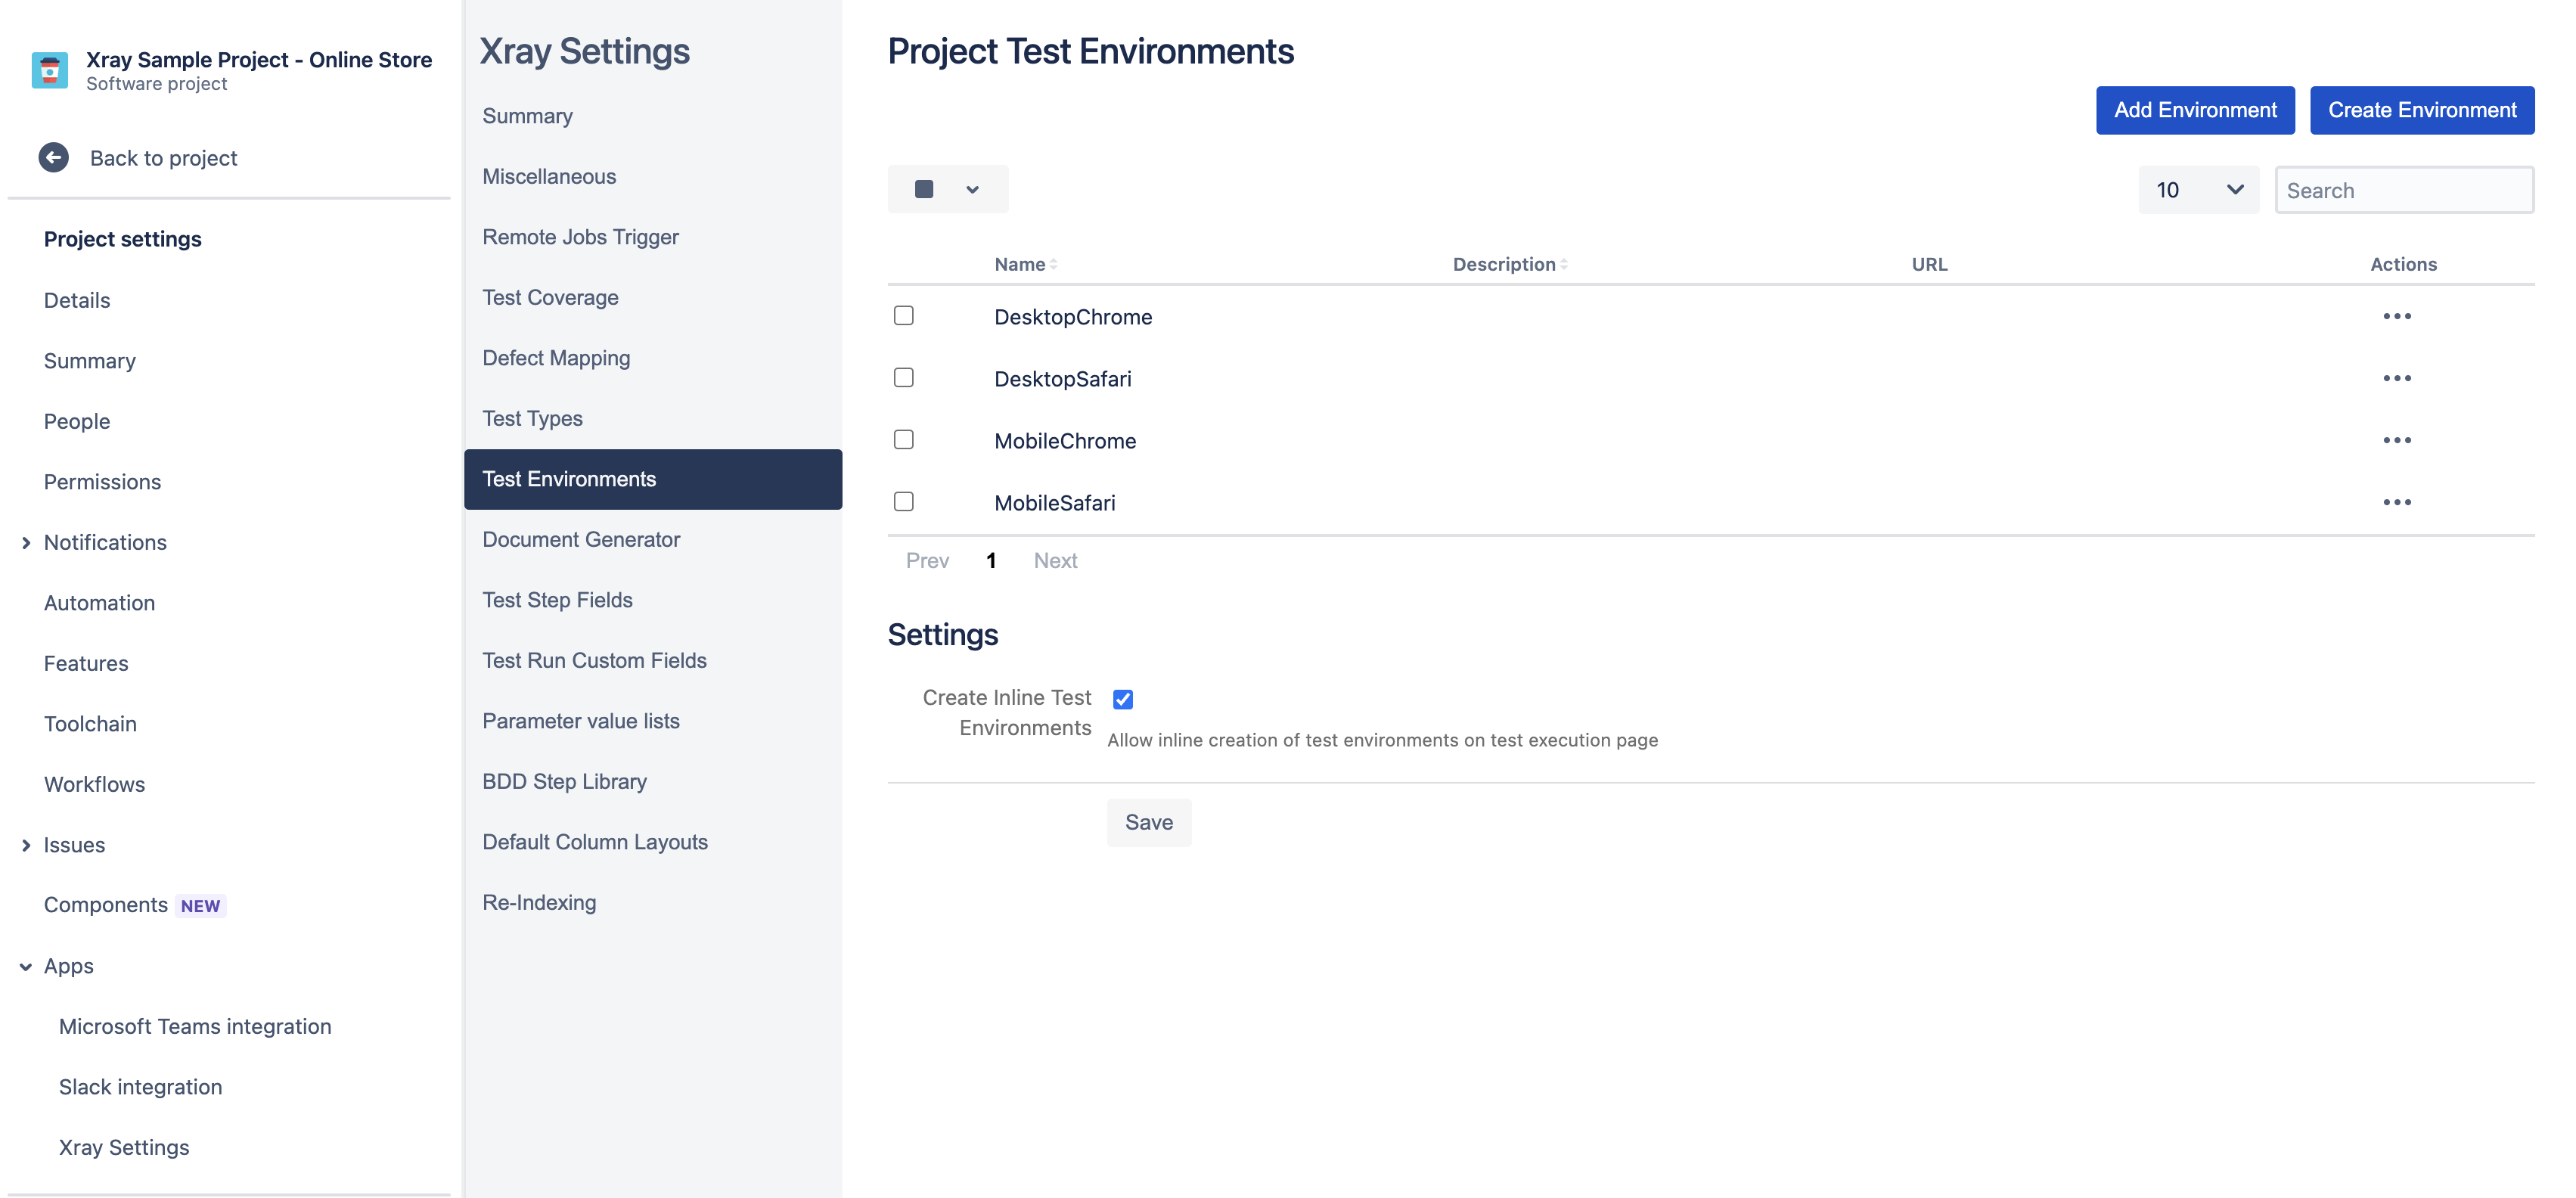
Create a new test environment. Go to left navigation menu Testing Board. Open Xray menu and click Configure Project. In Xray Settings choose Test Environments and create new environment.
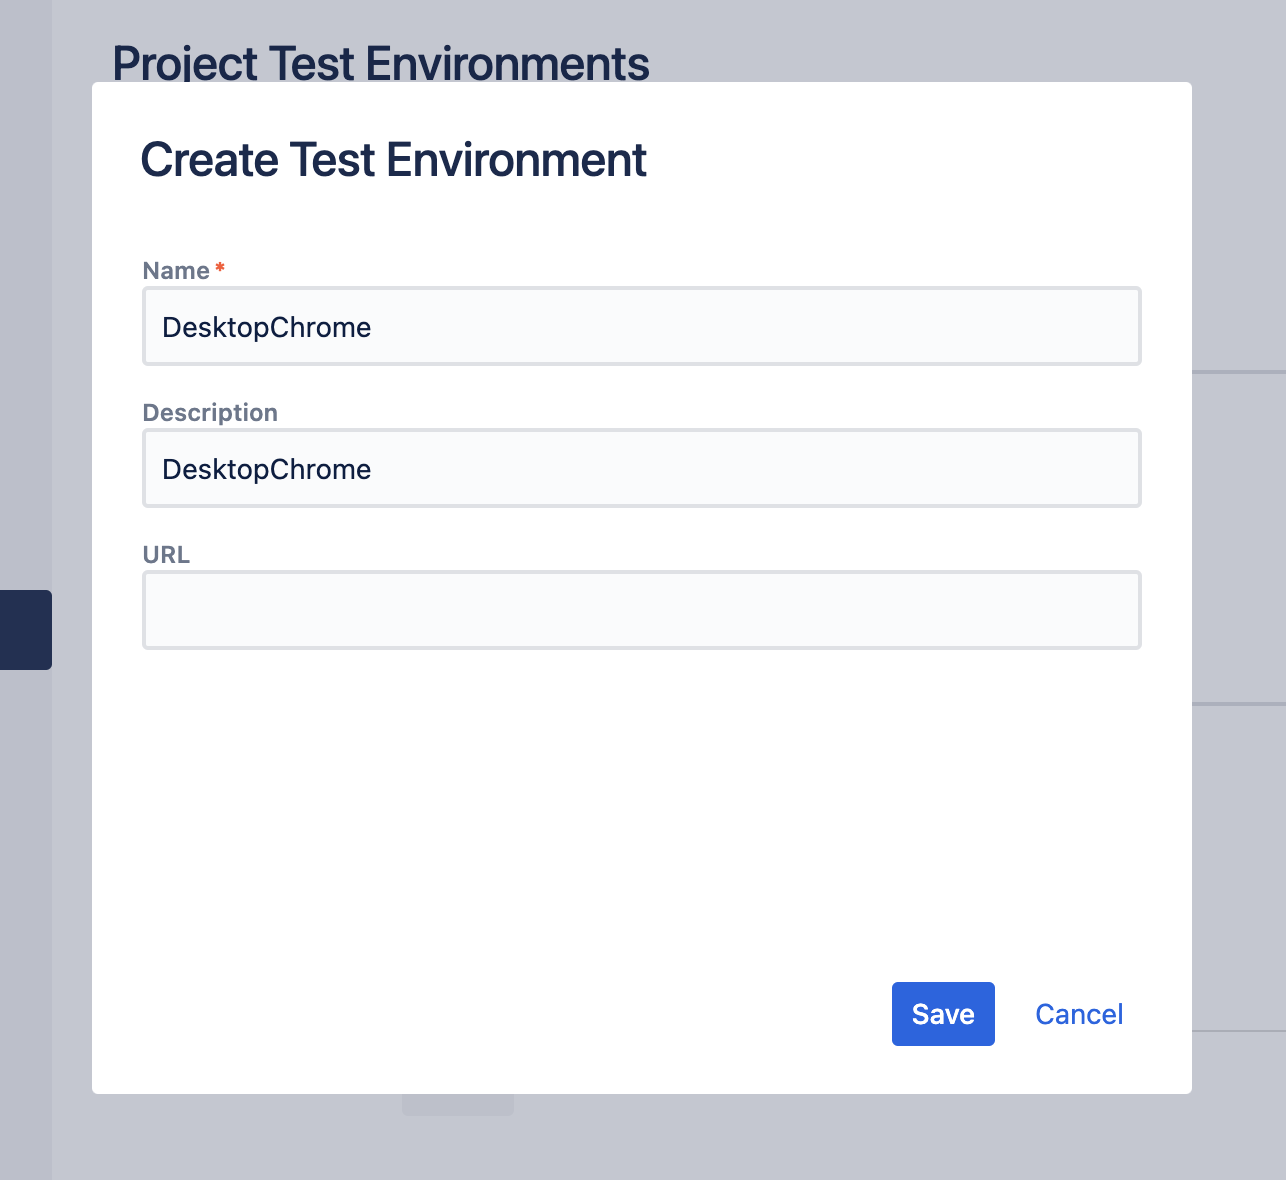
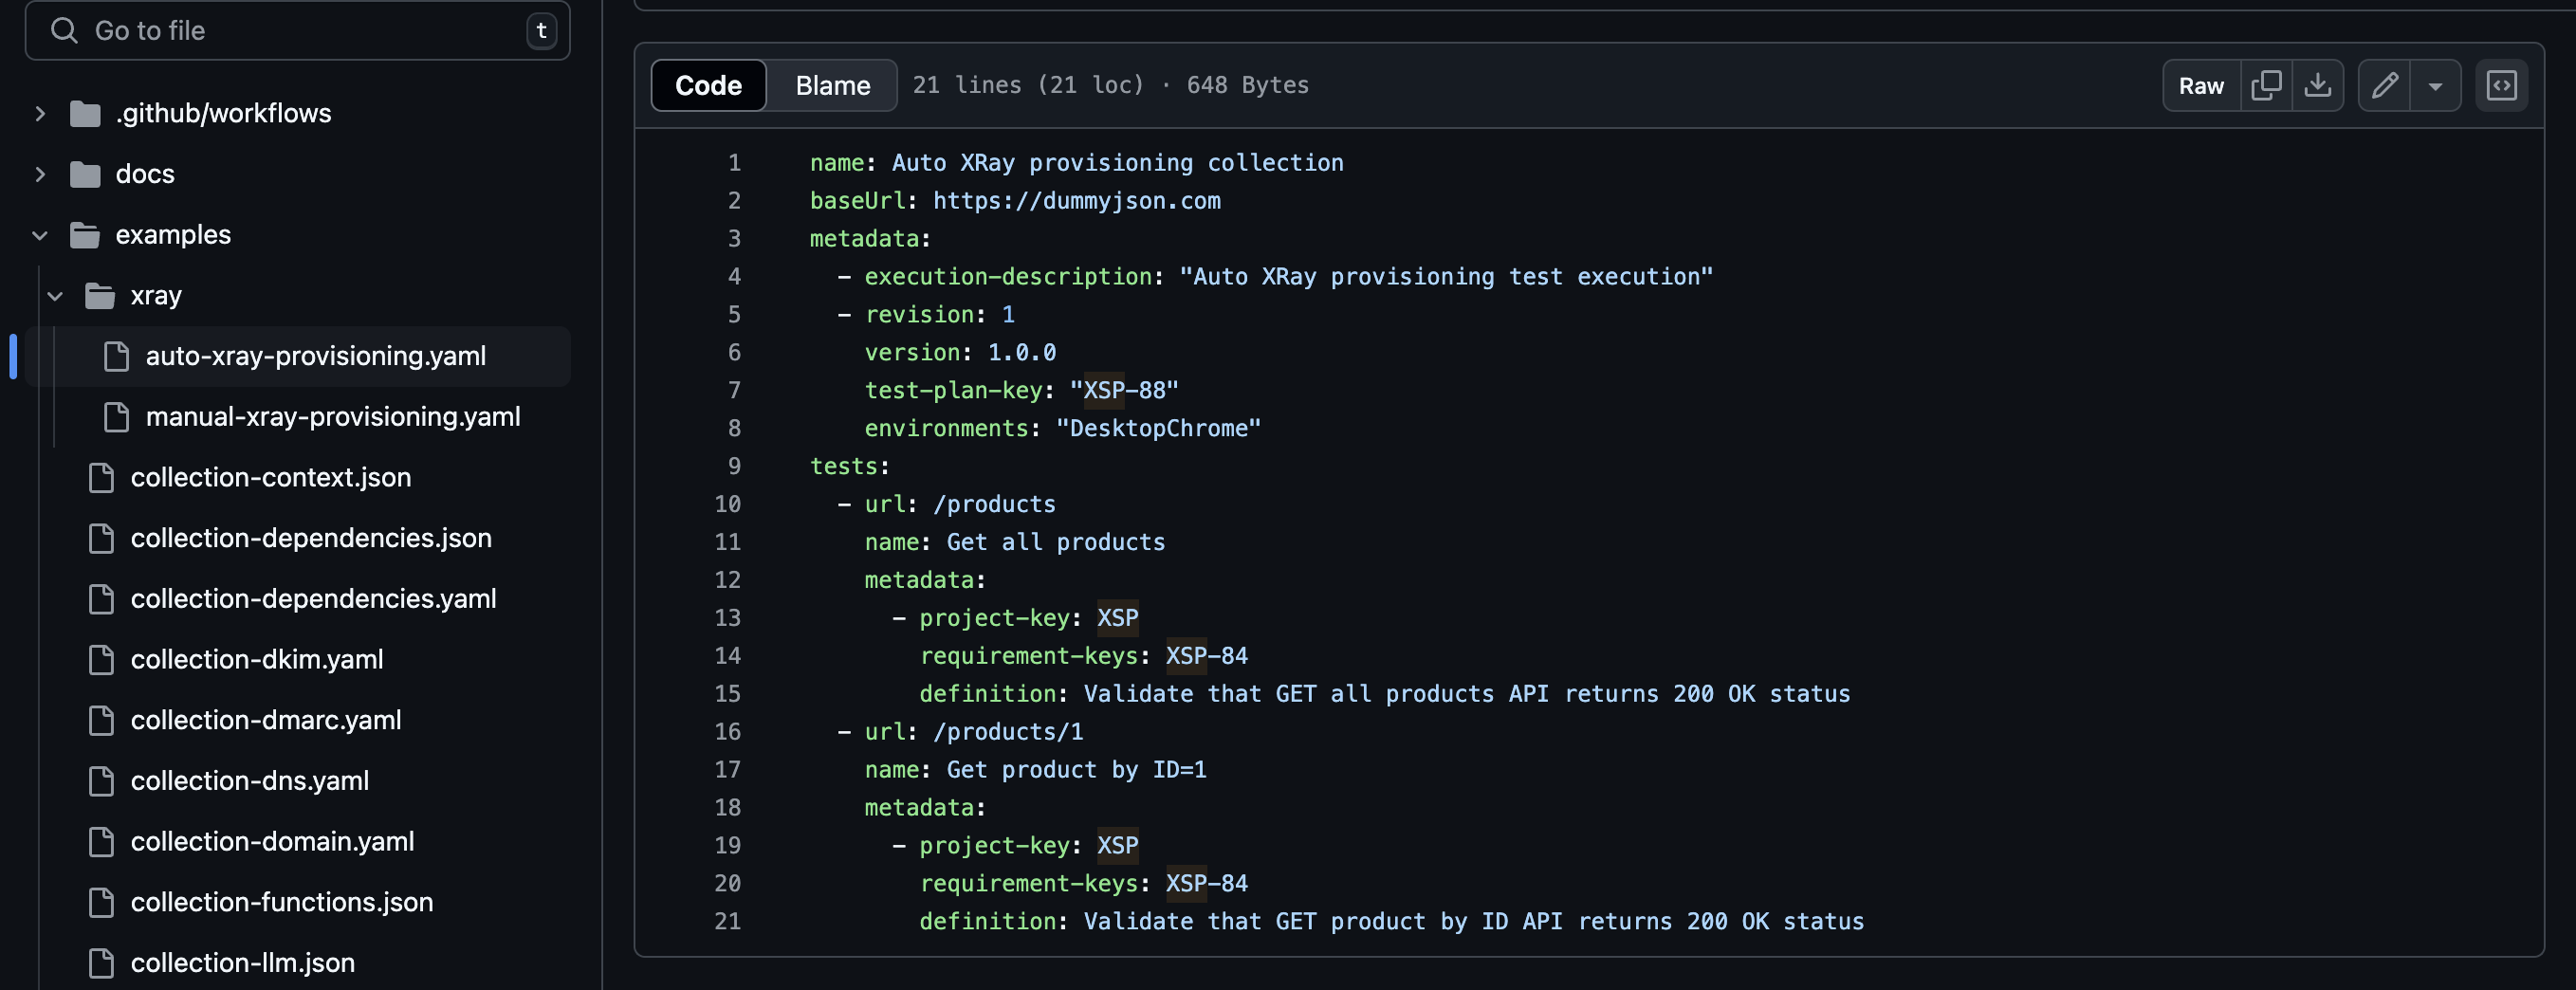
Create Testlemon test collection with some tests. Specify version, test plan and environment which exist in Jira. Add links to the Jira story for which these tests are.
name: Auto Xray provisioning collection
baseUrl: https://dummyjson.com
metadata:
  - execution-description: "Auto Xray provisioning test execution"
  - revision: 1
    version: 1.0.0 # Jira release/version
    test-plan-key: "XSP-88" # test plan key
    environments: "DesktopChrome" # Xray test environment
tests:
  - url: /products
    name: Get all products
    metadata:
      - project-key: XSP
        requirement-keys: XSP-84 # Jira story
        definition: Validate that GET all products API returns 200 OK status
  - url: /products/1
    name: Get product by ID=1
    metadata:
      - project-key: XSP
        requirement-keys: XSP-84 # Jira story
        definition: Validate that GET product by ID API returns 200 OK status
Save test collection in version control.
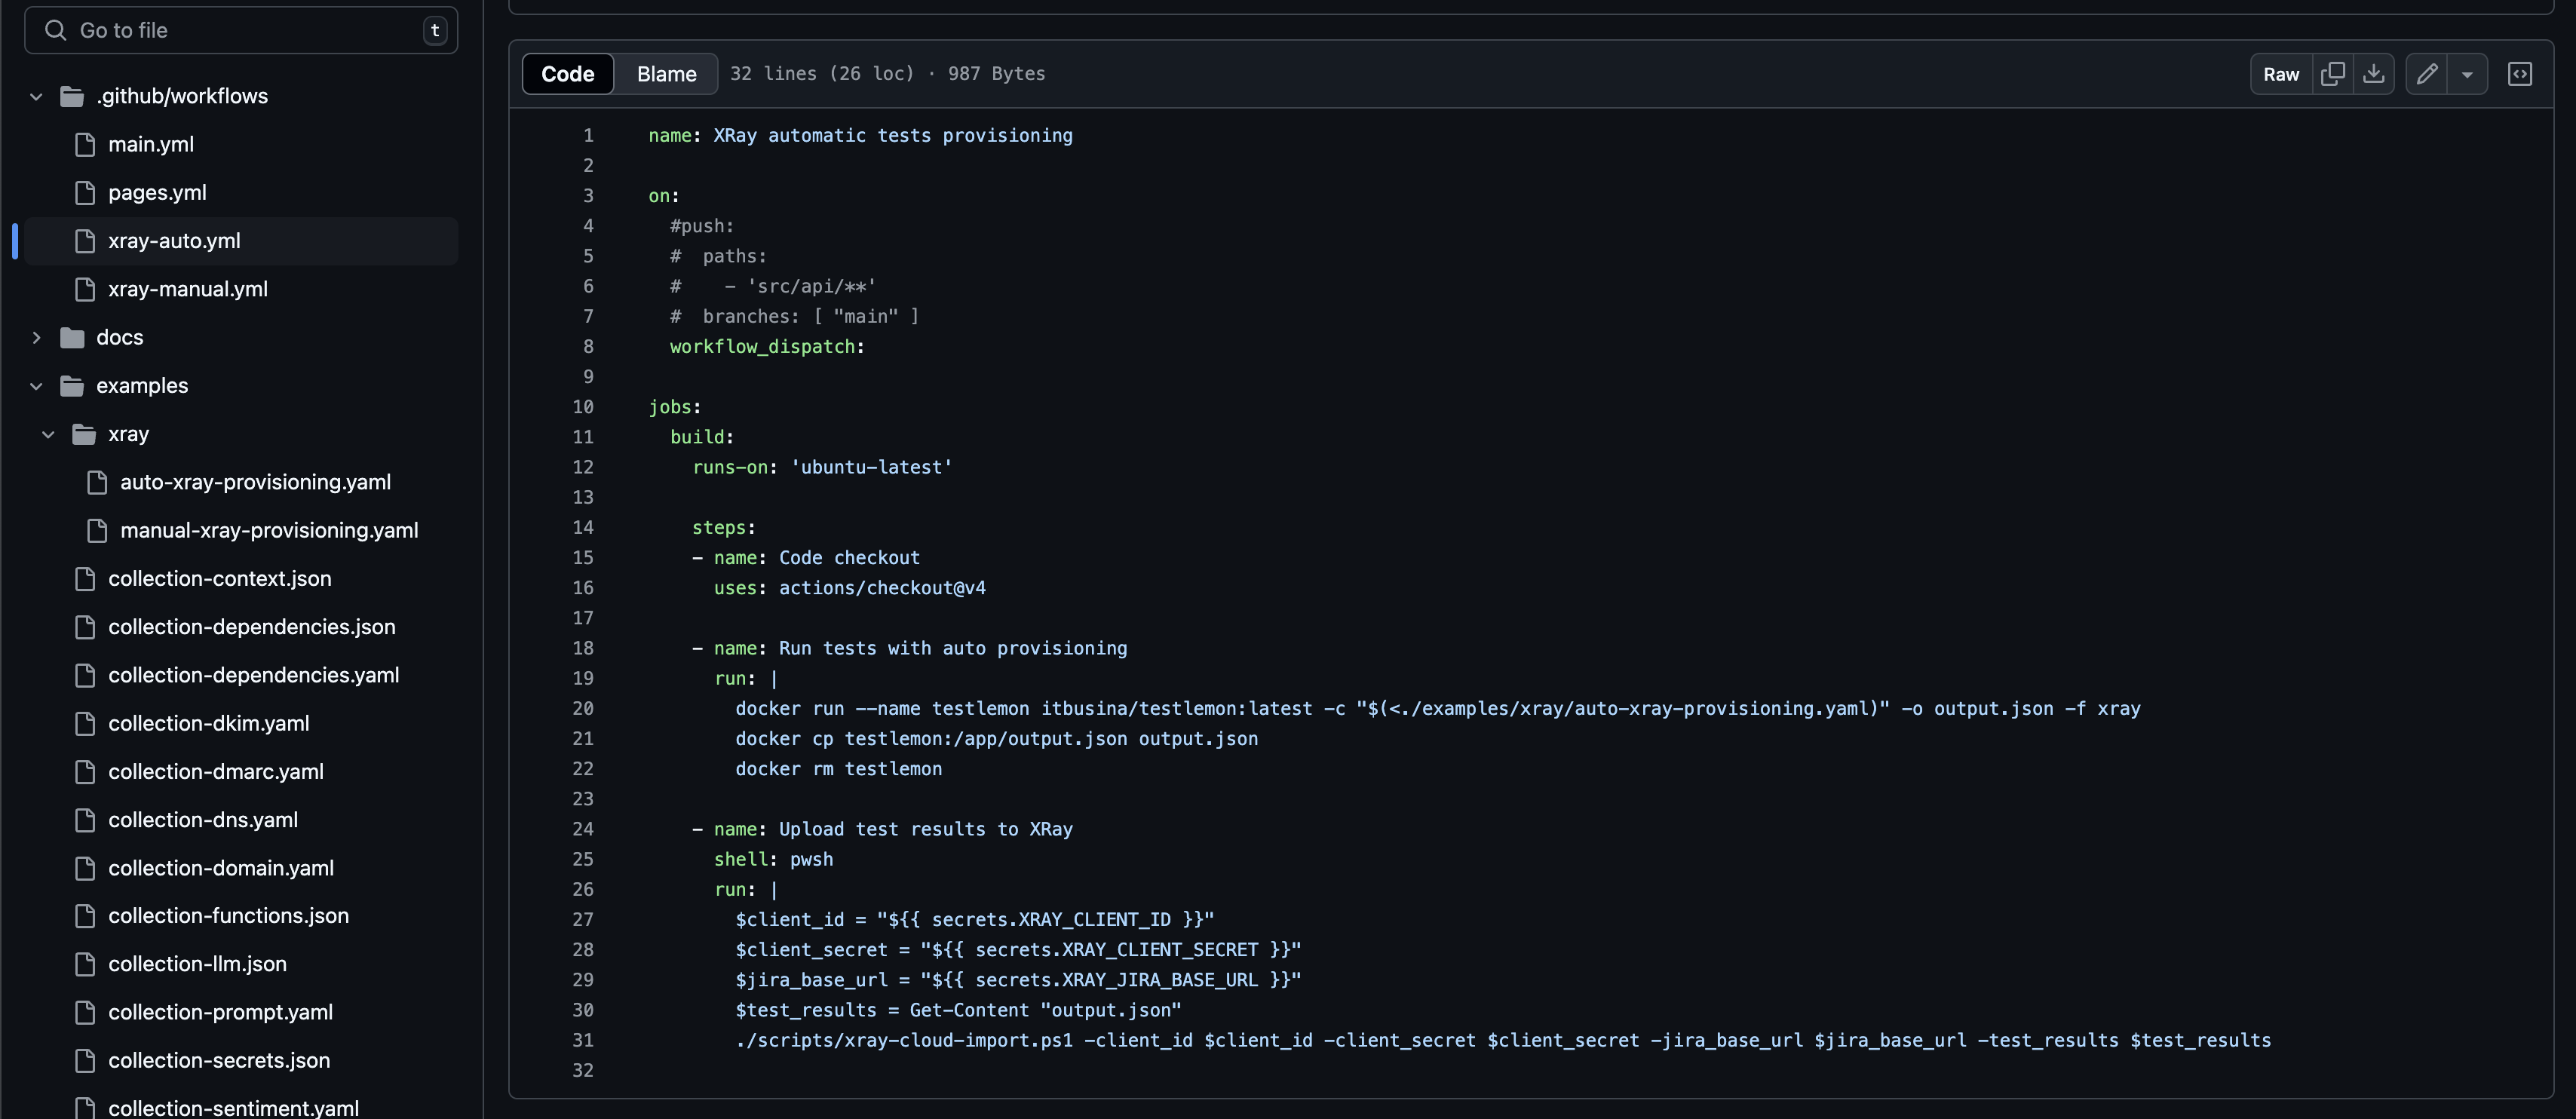
Configure CI/CD pipeline to execute this test collection.
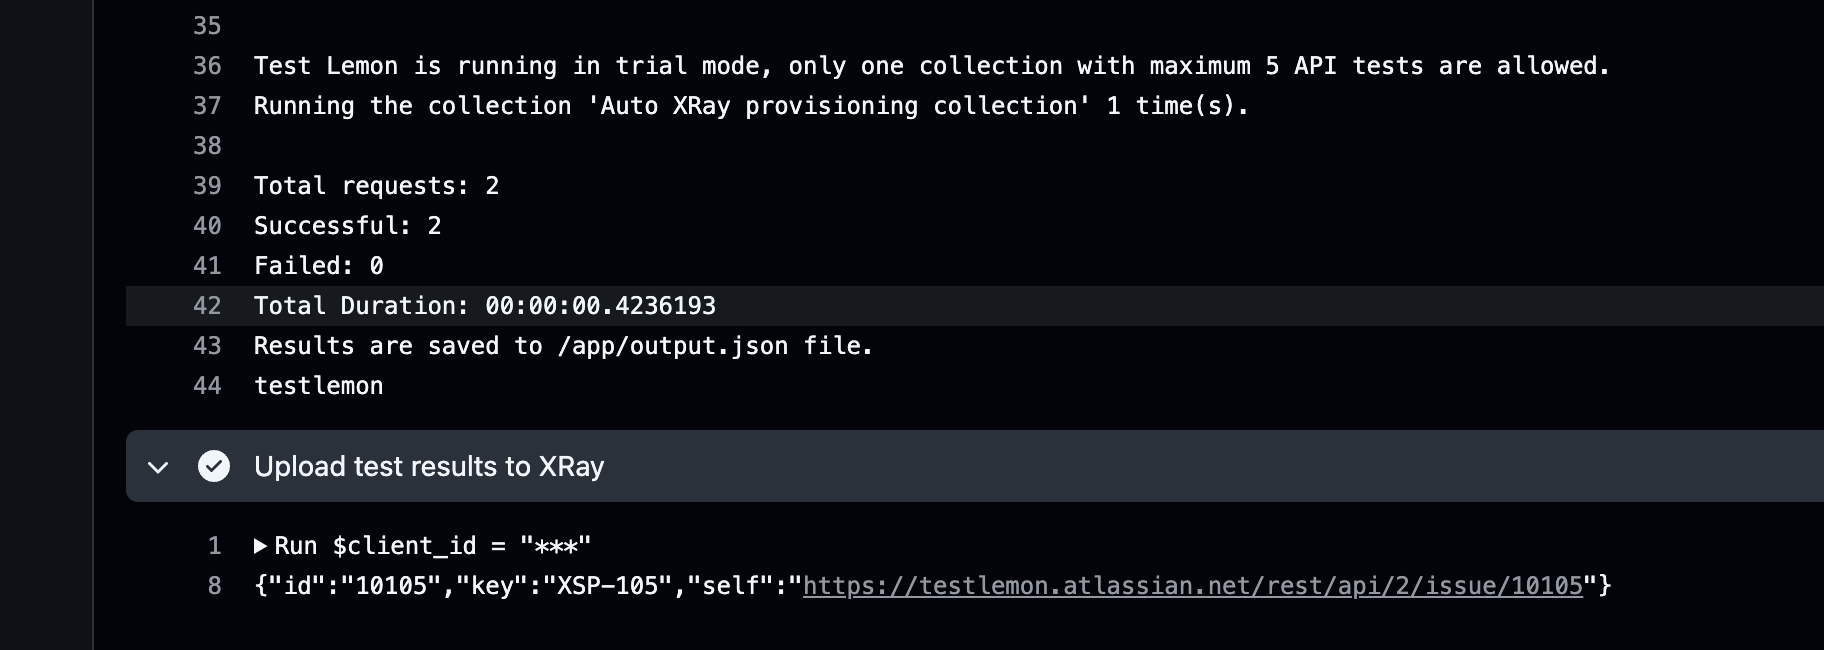
Run the pipeline.

Wait until it is completed and observe the logs.
Open the Jira Story.
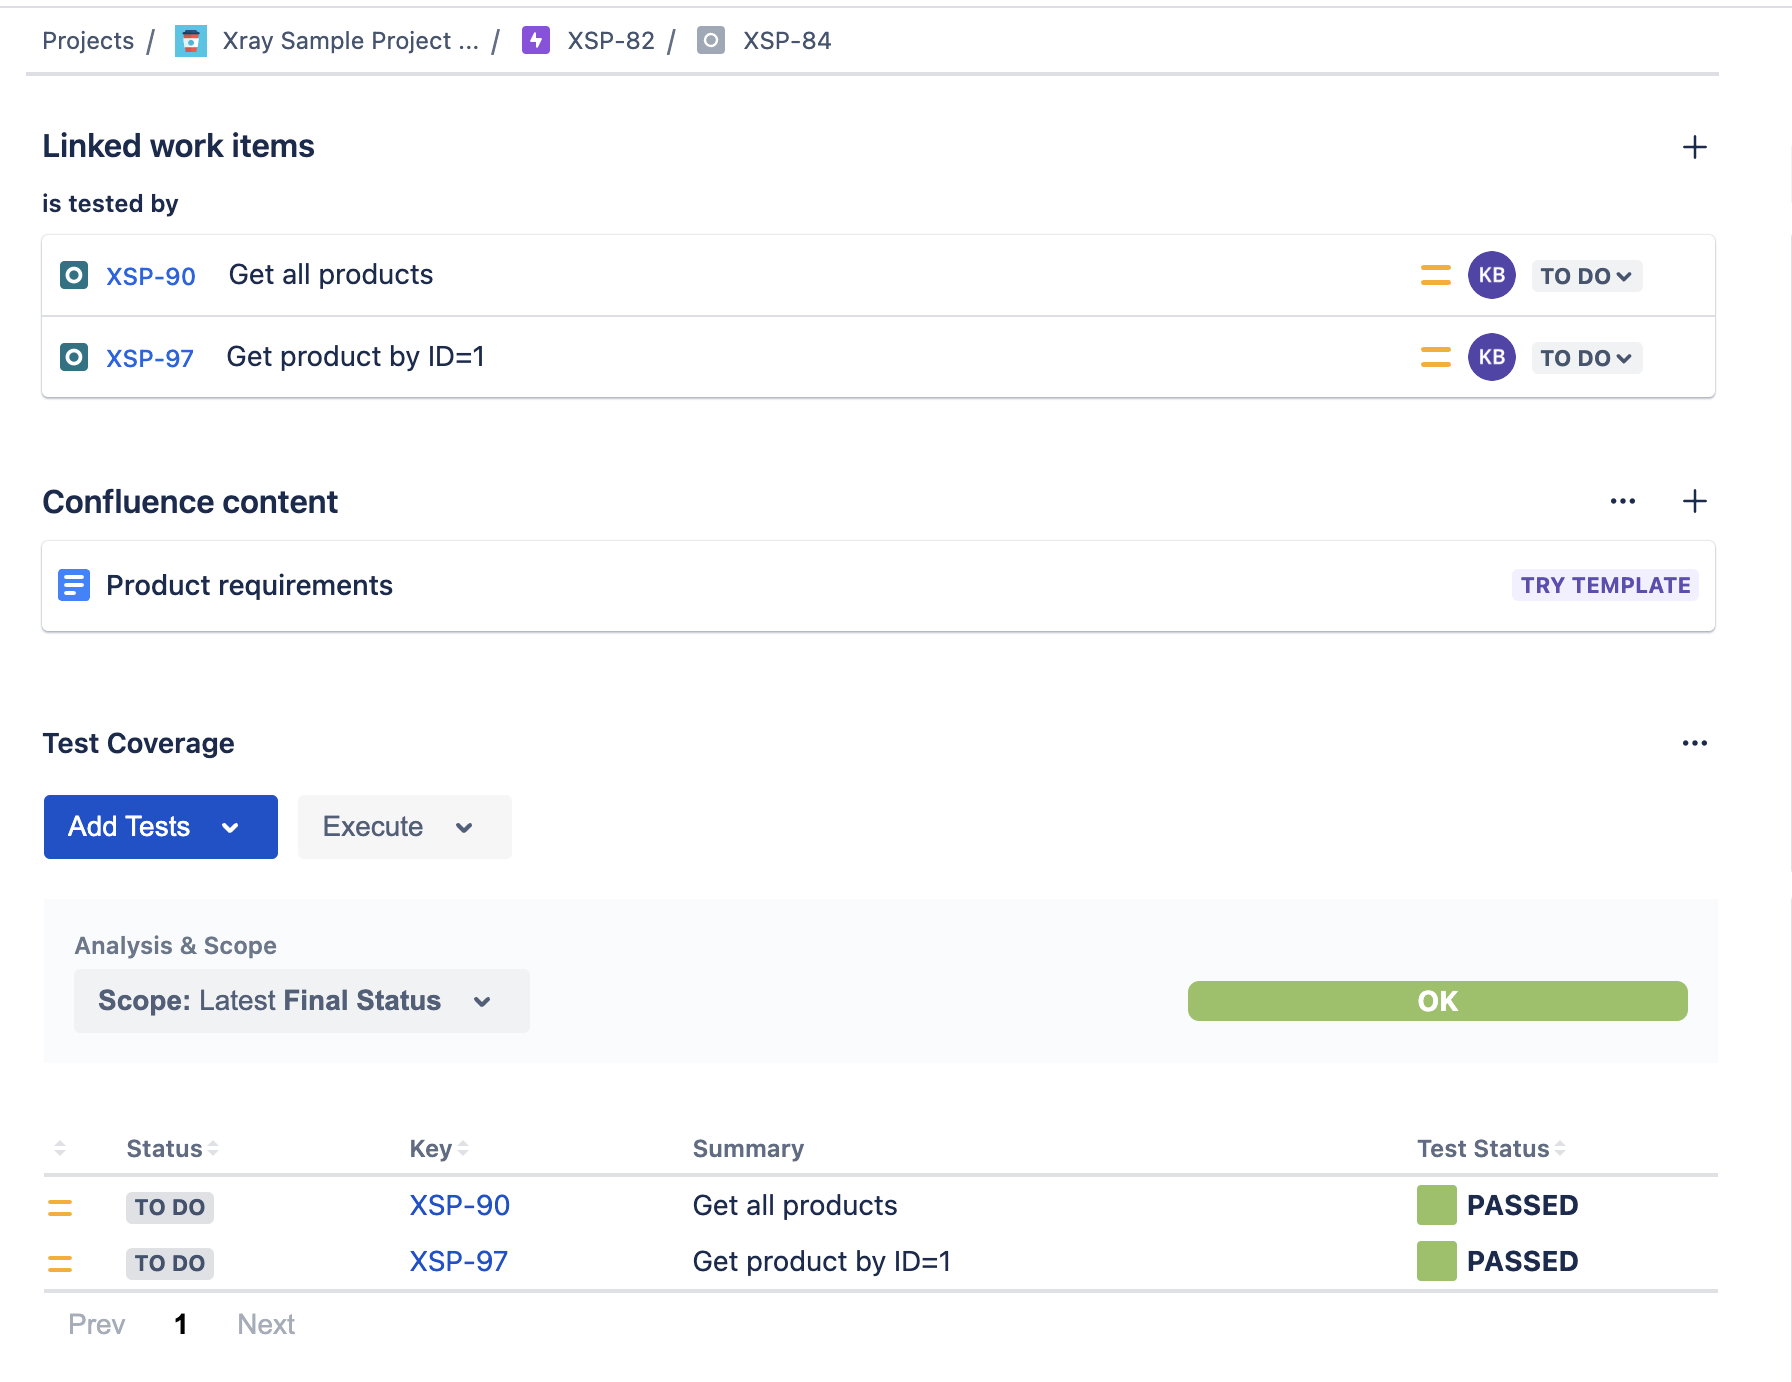
Open test plan and observe the tests.
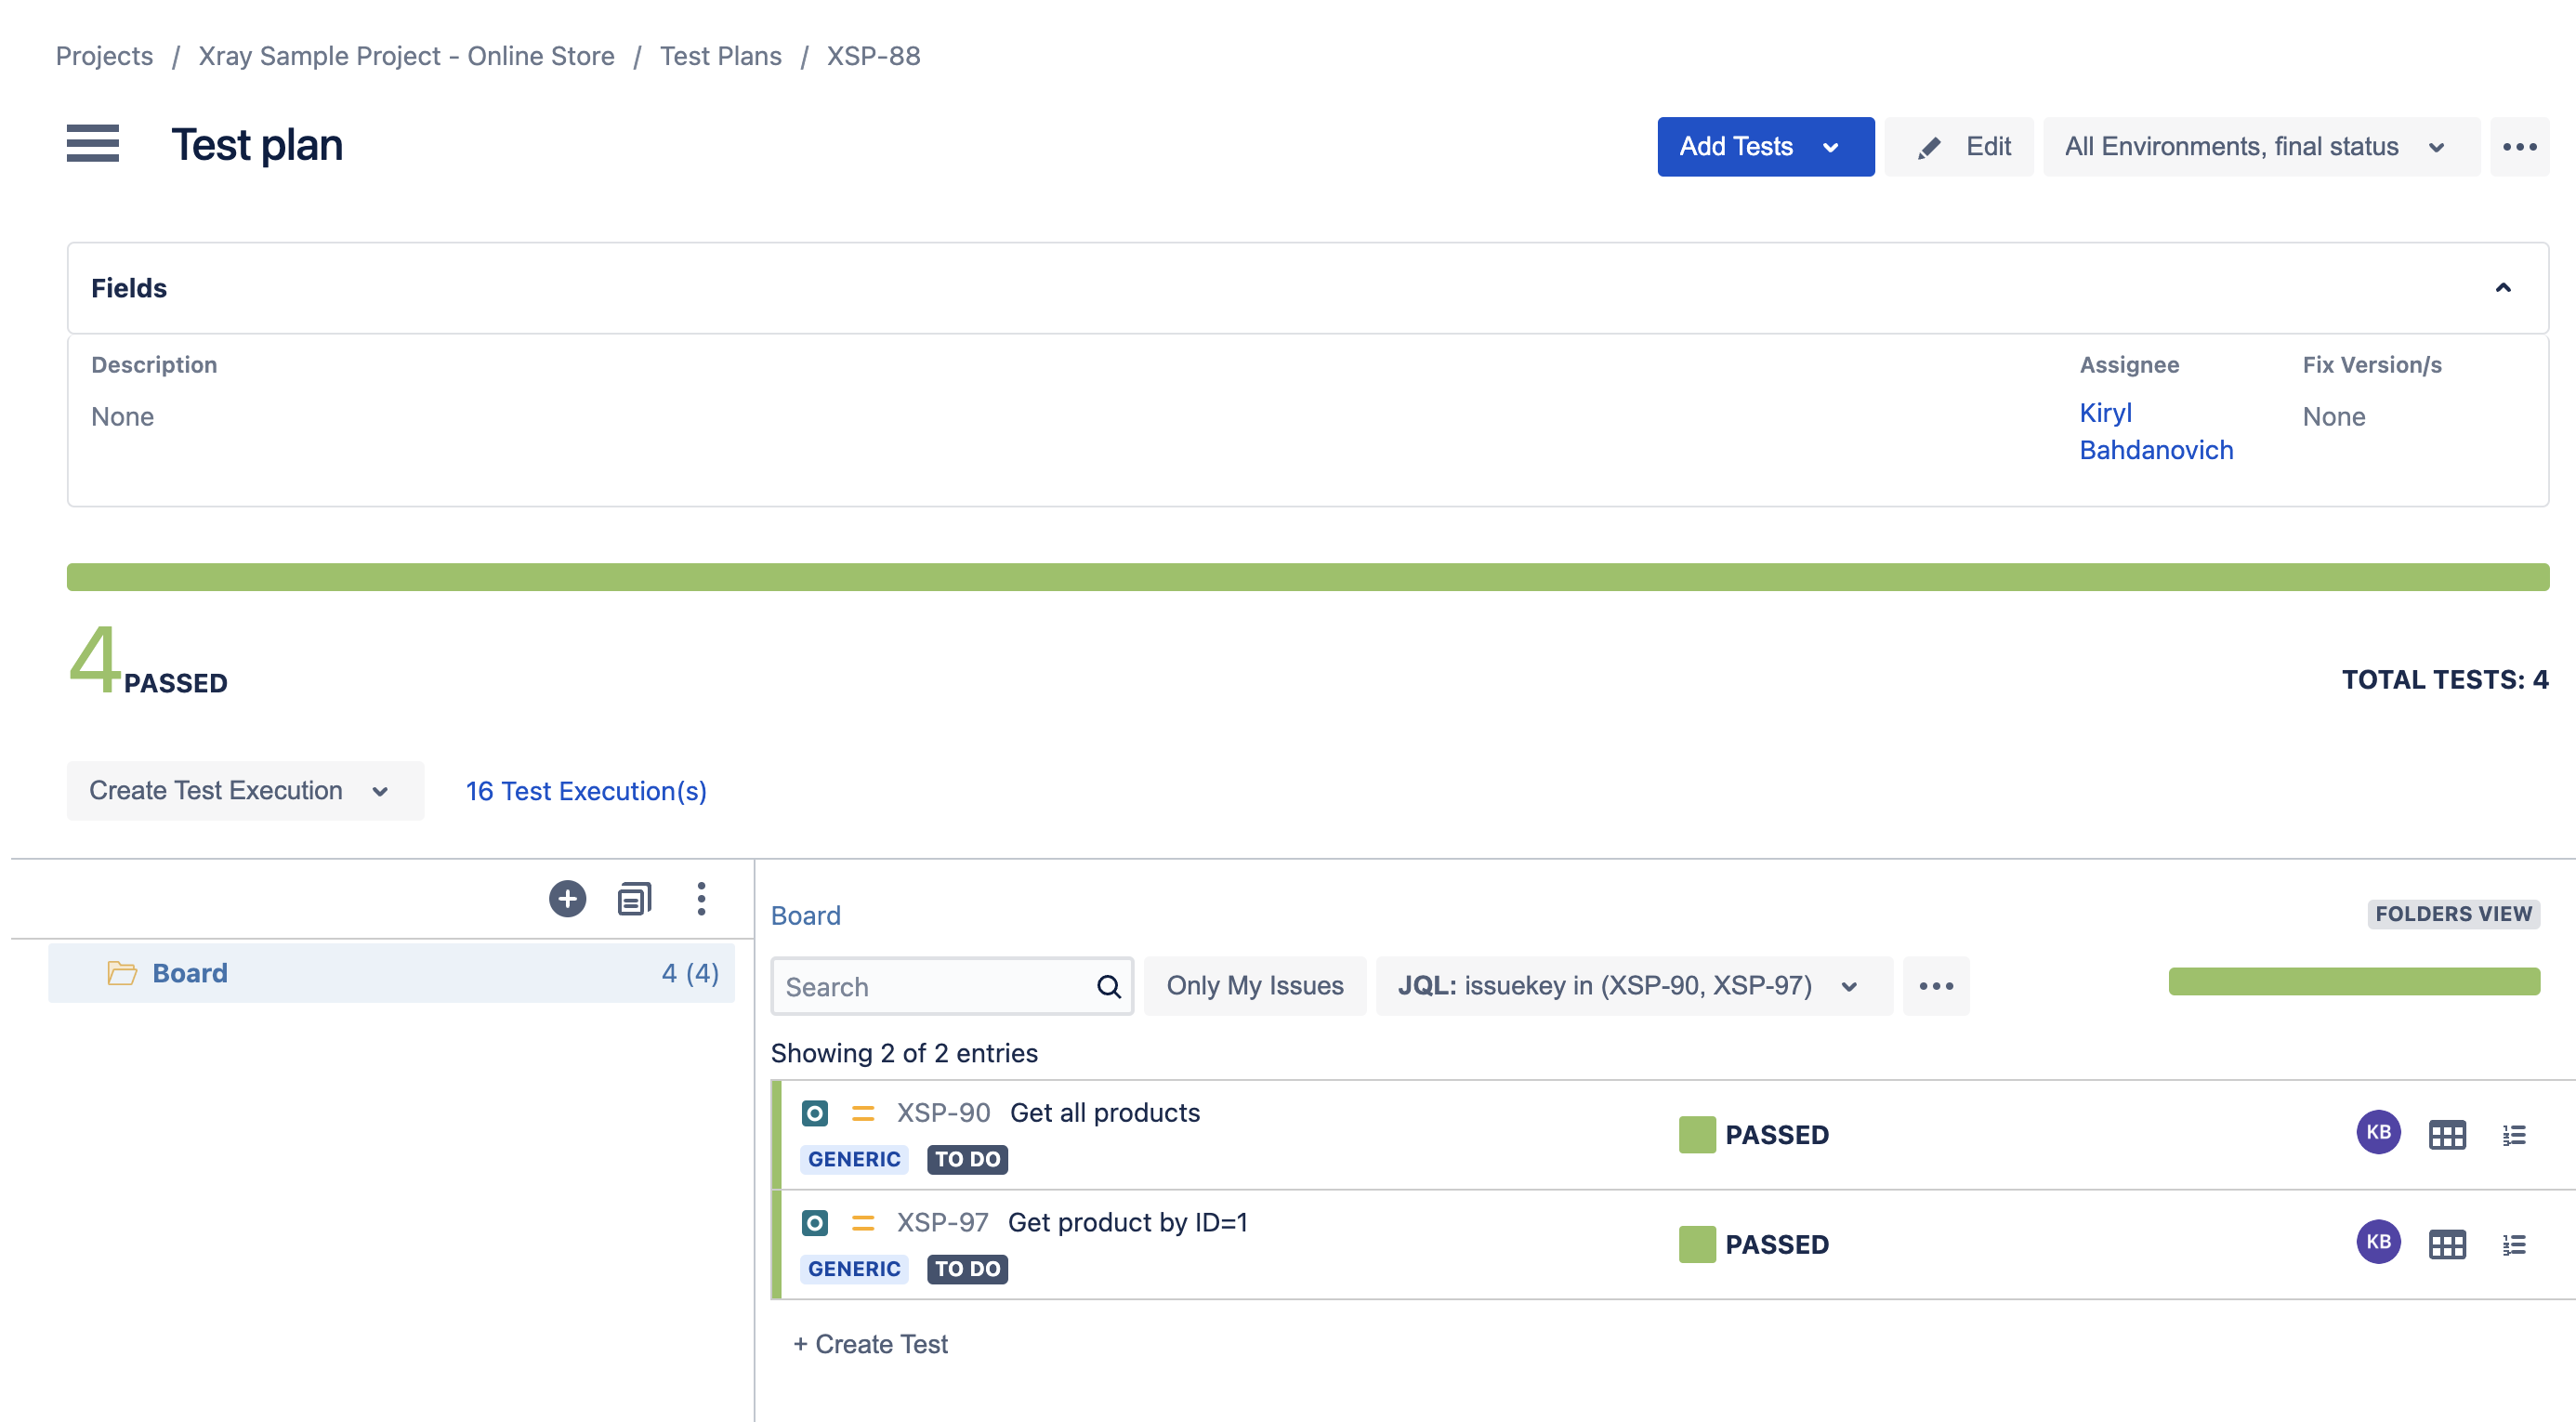
Tests were auto-populated and execution results are stored in Jira Xray. Now you can link these tests to other stories, add them to other test plans or test sets.
Manual Xray tests provisioning
Manual Xray tests provisioning process means that tests are first created in Jira Xray and then updated by results from Testlemon.
Go to top navigation menu and click Create button.

Create a new EPIC in JIRA. Choose issue type Epic click Create.

Create a new Story in JIRA. Go to top navigation menu and click Create button. Choose issue type Story, select parent Epic and click Create.

Create new tests. Go to top navigation menu and click Create button. Choose issue type Test and click Create.


Create a new Test plan in JIRA. Go to top navigation menu and click Create button. Choose issue type Test Plan and click Create.

Create a new Version. Go to left navigation menu Development > Relases. Click Create Version button and create a new version.

Create a new test environment. Go to left navigation menu Testing Board. Open Xray menu and click Configure Project. In Xray Settings choose Test Environments and create new environment.


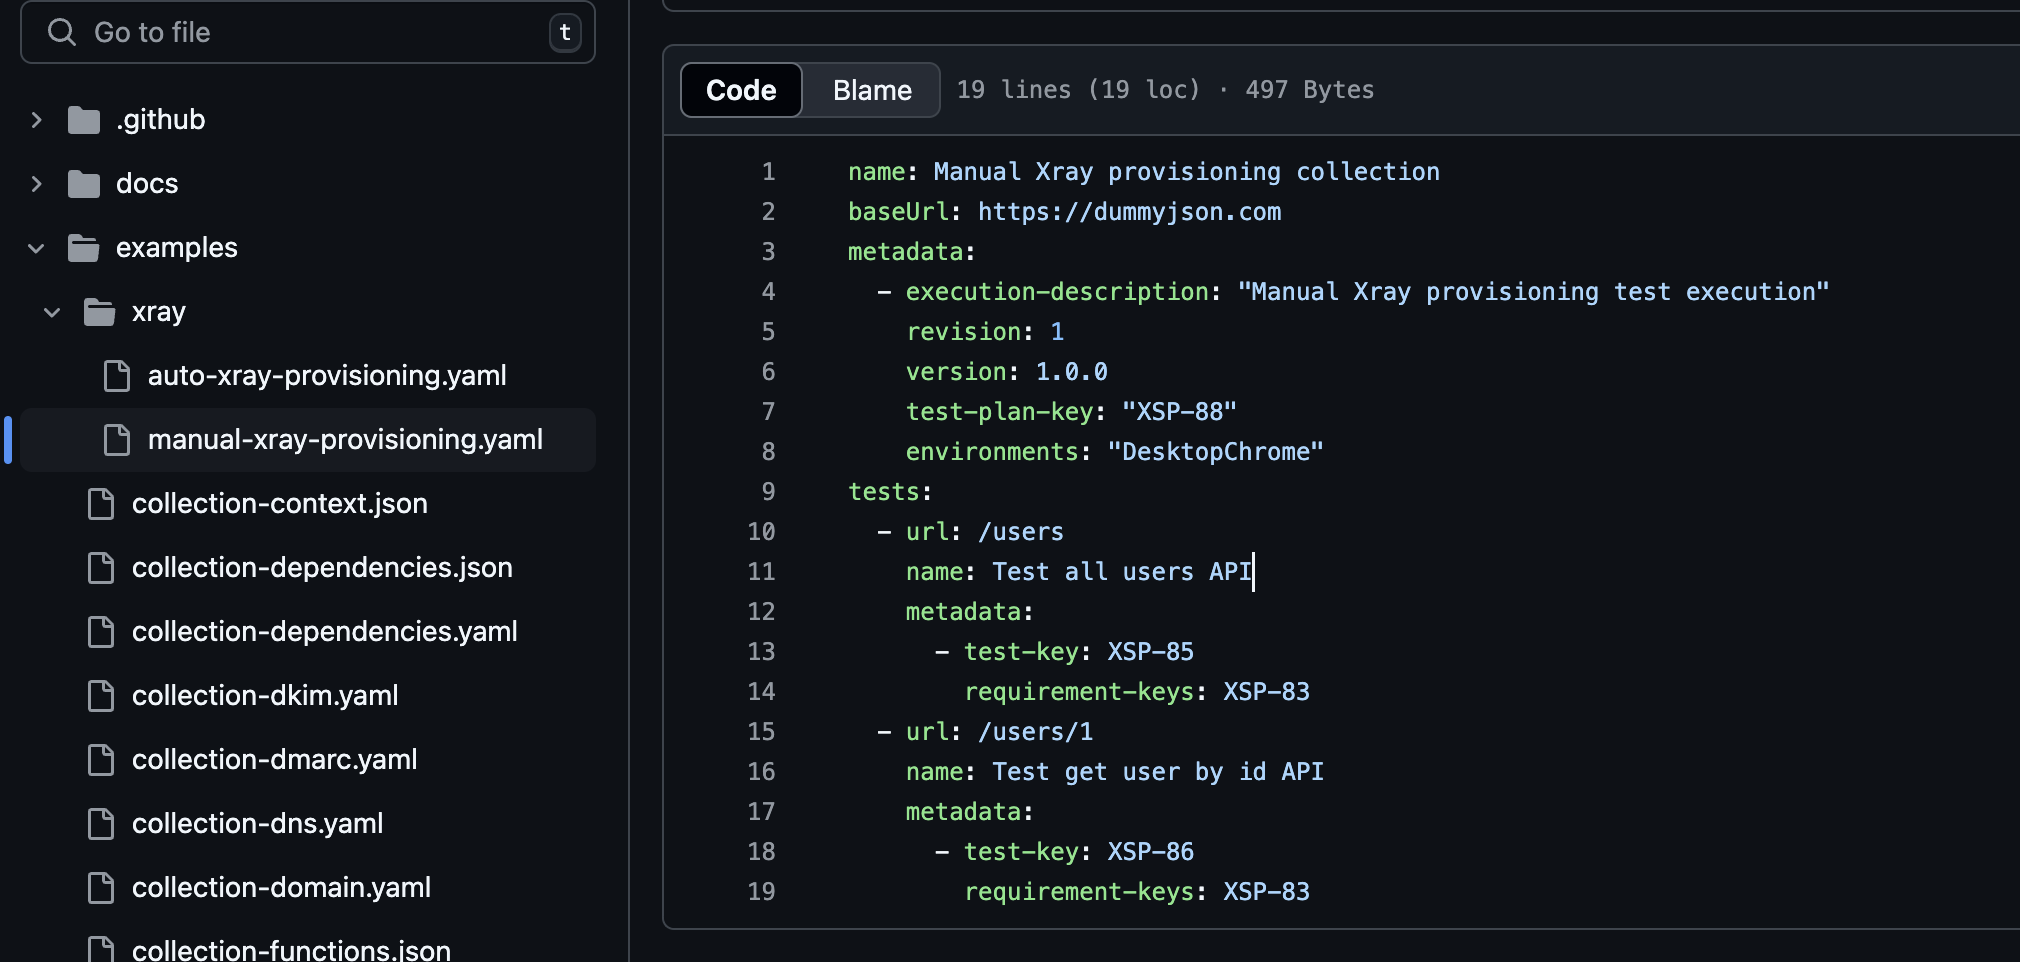
Create Testlemon test collection with some tests. Specify version, test plan and environment which exist in Jira. Add links to the Jira story for which these tests are.
name: Manual Xray provisioning collection
baseUrl: https://dummyjson.com
metadata:
  - execution-description: "Manual Xray provisioning test execution"
    revision: 1
    version: 1.0.0
    test-plan-key: "XSP-88"
    environments: "DesktopChrome"
tests:
  - url: /users
    name: Test all users API
    metadata:
      - test-key: XSP-85
        requirement-keys: XSP-83
  - url: /users/1
    name: Test get user by id API
    metadata:
      - test-key: XSP-86
        requirement-keys: XSP-83
Save test collection in version control.
Configure CI/CD pipeline to execute this test collection.

Run the pipeline.

Wait until it is completed and observe the logs.

Open the Jira Story.
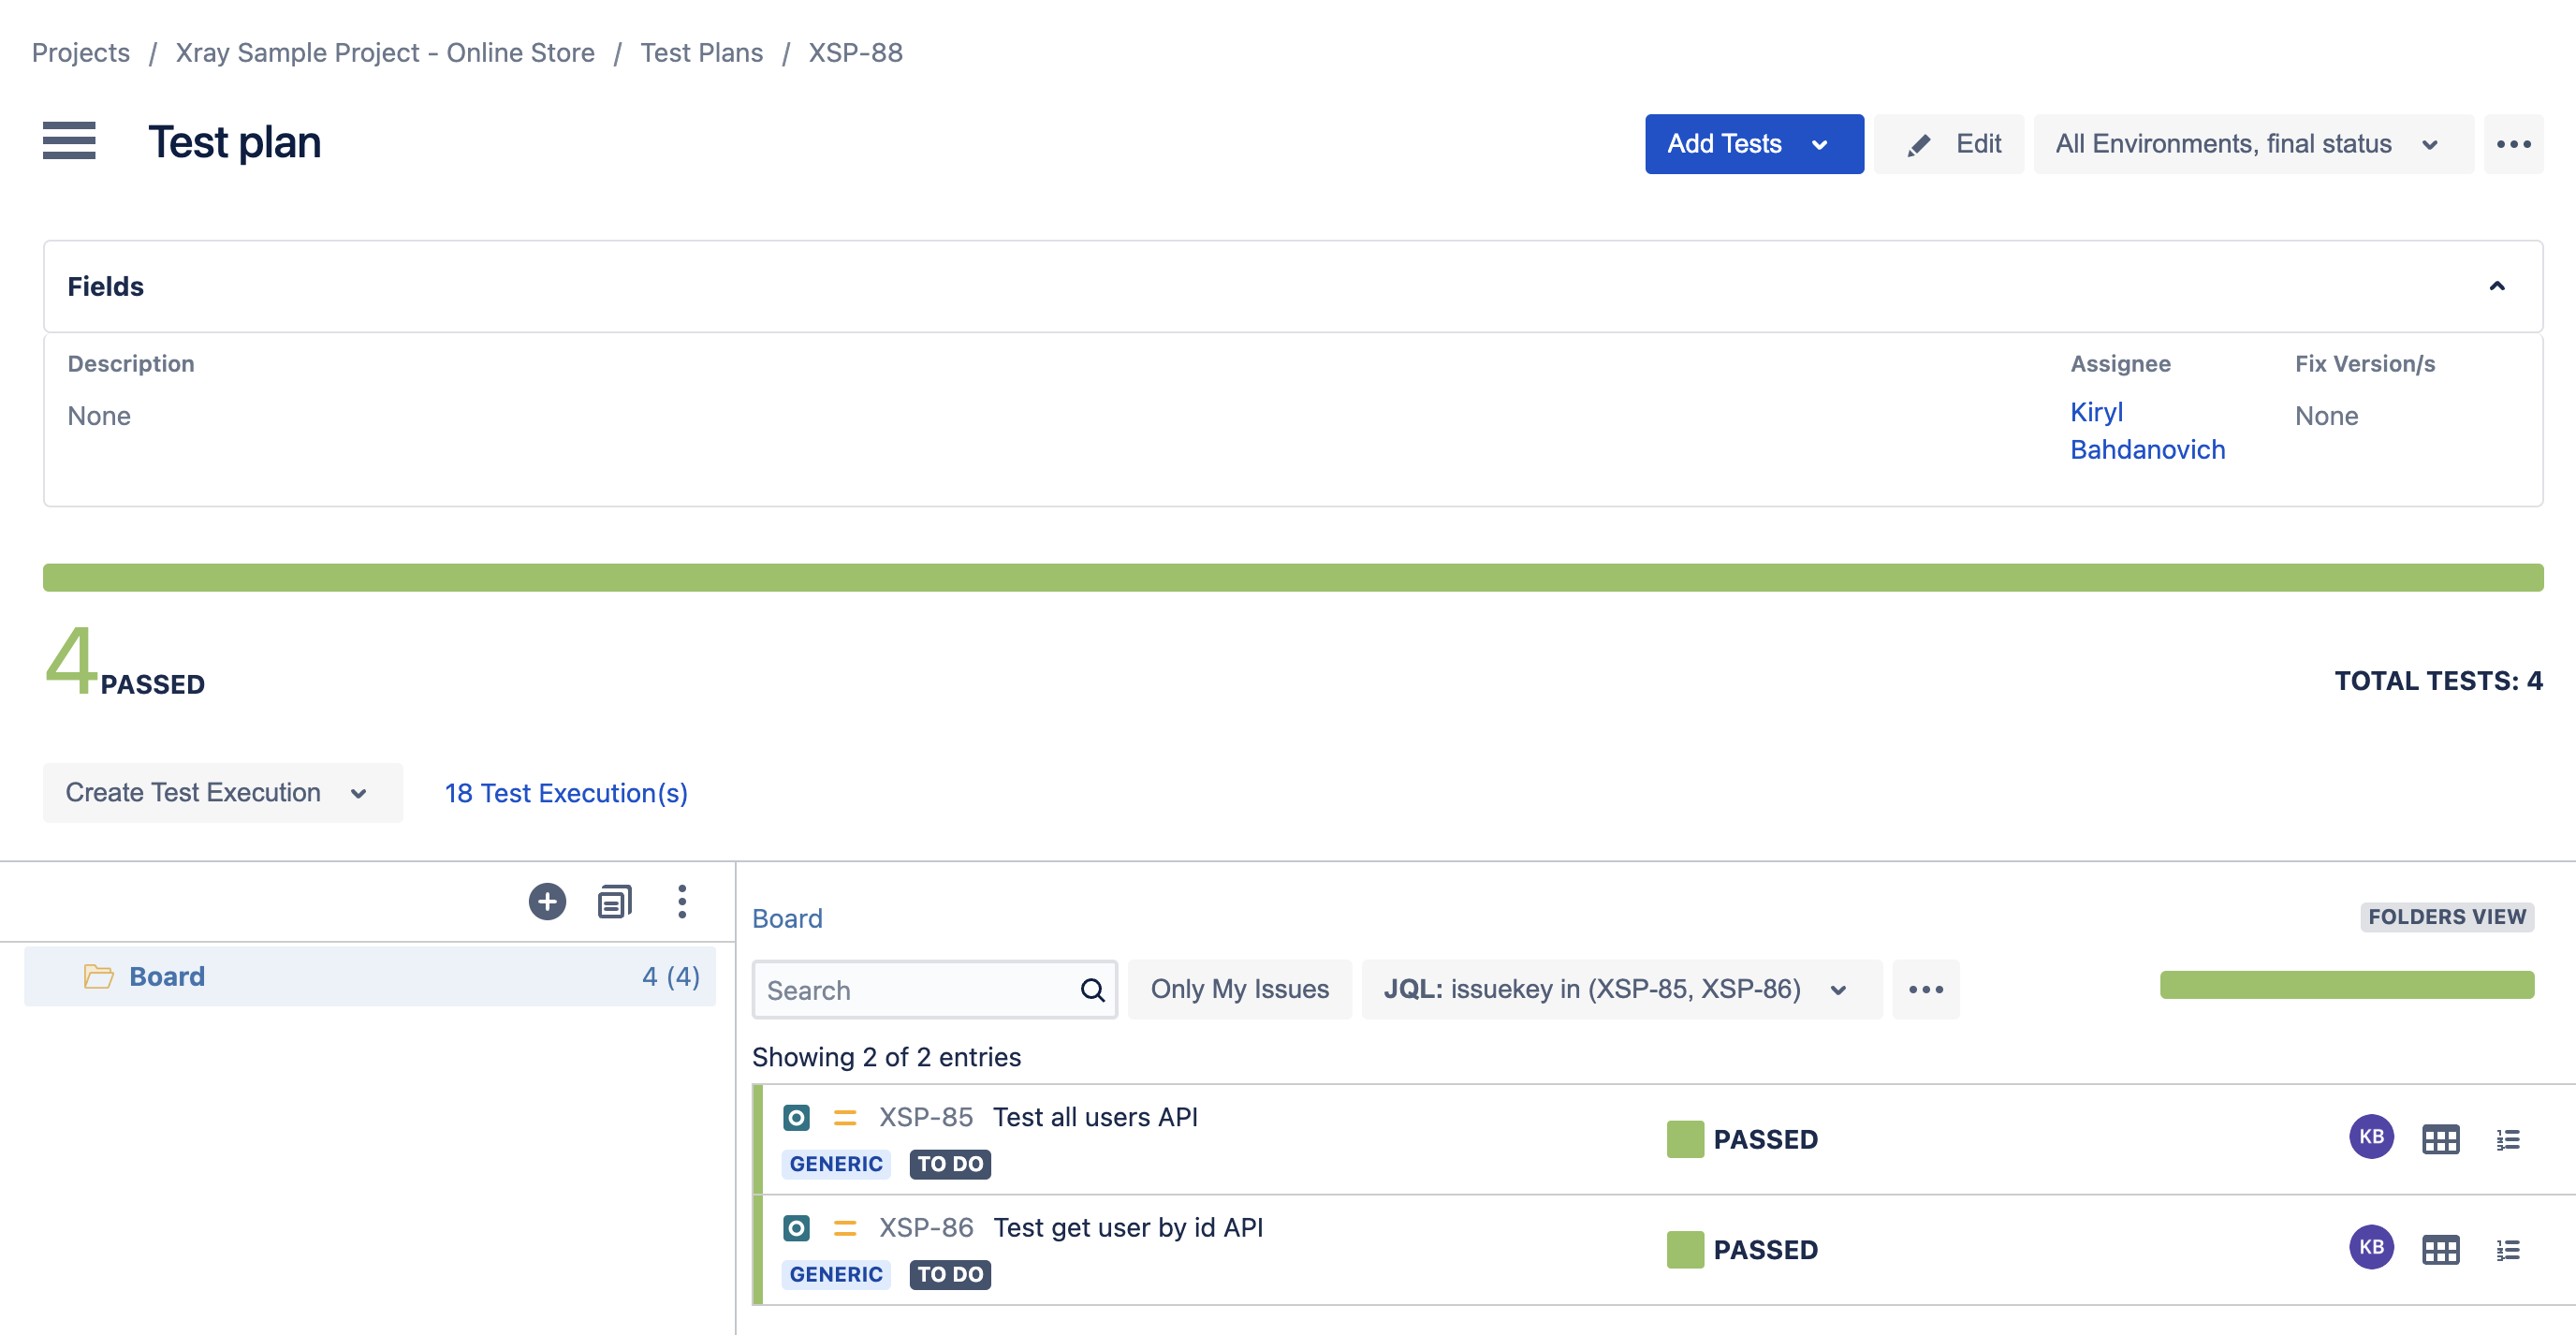
Open test plan and observe the tests.
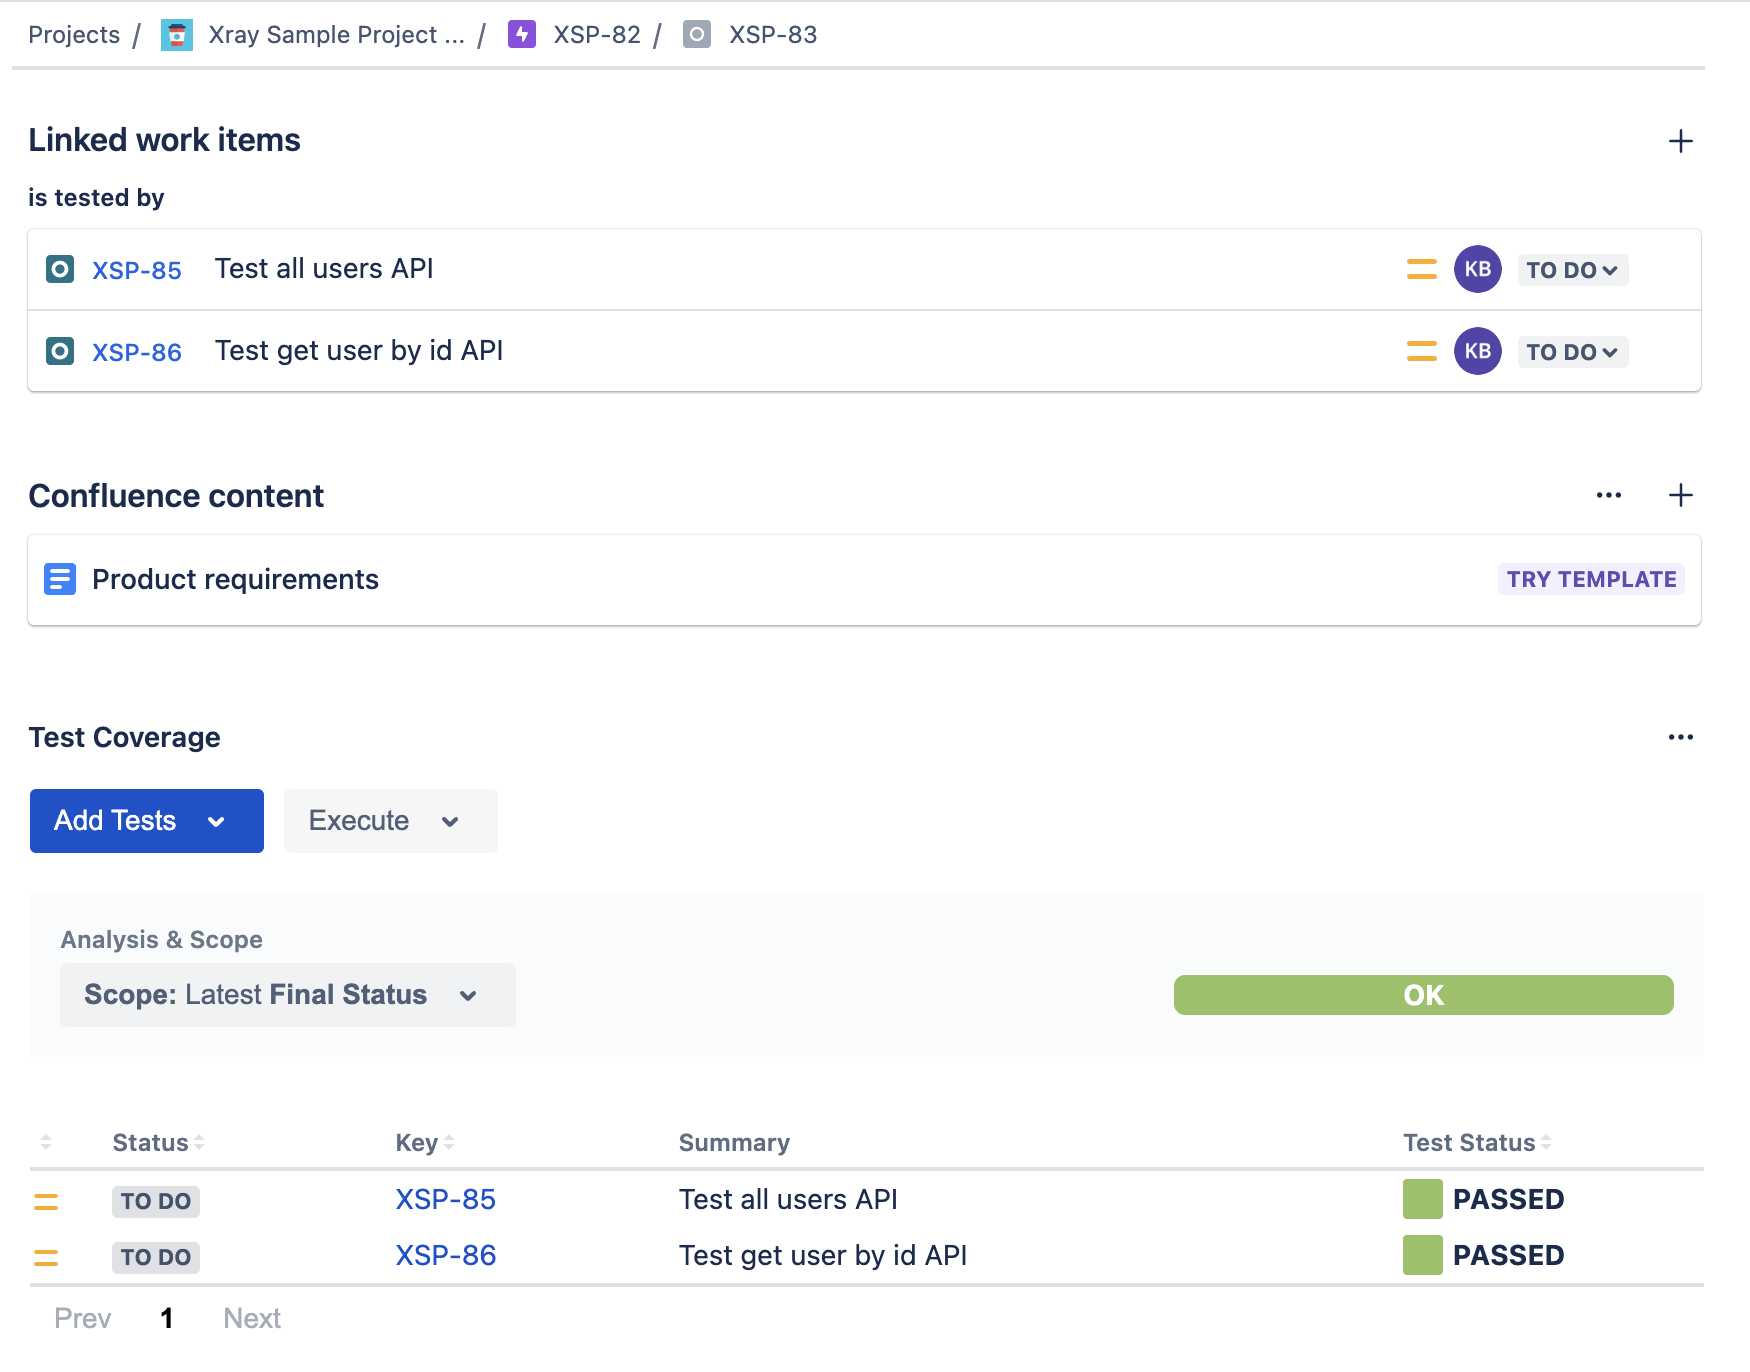
Tests were updated from Testlemon execution report and stored in Jira Xray.